Creating stylish and personalized bracelets is a fun and rewarding activity, especially when it involves DIY string bracelets and designs. With a variety of colors and patterns to choose from, string bracelets offer endless possibilities to express your personality and creativity. The process of making these fashionable accessories can be as simple or complex as you desire, giving you the flexibility to experiment and learn new techniques along the way.
In recent years, string bracelets have regained popularity as a meaningful way to connect with friends and loved ones through the exchange of handmade gifts. These bracelets, often referred to as friendship bracelets, symbolize special memories, experiences, or even milestones shared between two individuals. By learning how to make DIY string bracelets, you can create unique tokens of appreciation and care for the important people in your life.
As you venture into the world of making string bracelets, it’s crucial to understand the basic techniques and materials. Selecting quality embroidery thread, learning basic knots, and combining colors effectively can help elevate your creations. With practice and patience, you will quickly become proficient in crafting eye-catching designs that are perfect for gifting or personal adornment.
Types of DIY String Bracelets
There are numerous ways to create beautiful DIY string bracelets with different materials, patterns, and techniques. Let’s take a look at some popular types of string bracelets and the techniques used to create them.
Knots and Braids: The foundation of many DIY string bracelets is knotting and braiding techniques. These techniques, often used in friendship bracelets, involve various patterns of knots and braids to create intricate designs, such as the candy stripe or the zig zag friendship bracelet. You can choose different colors and thicknesses of strings, like embroidery floss, to achieve unique effects.
Macrame Bracelets: Macrame is a technique that uses knots to create decorative patterns and structures on a string or cord. Macrame bracelets are a trendy choice for DIY enthusiasts. They can feature various styles, ranging from simple designs like square knots and spirals to more complex patterns like alternating half hitches and double half hitch knots.
Chevron: The chevron is another popular pattern often used for friendship bracelets. This design features a distinctive V-shaped pattern, achieved by creating diagonal rows of knots. You can create stunning multicolored bracelets with a chevron pattern using the embroidery floss of your choice.
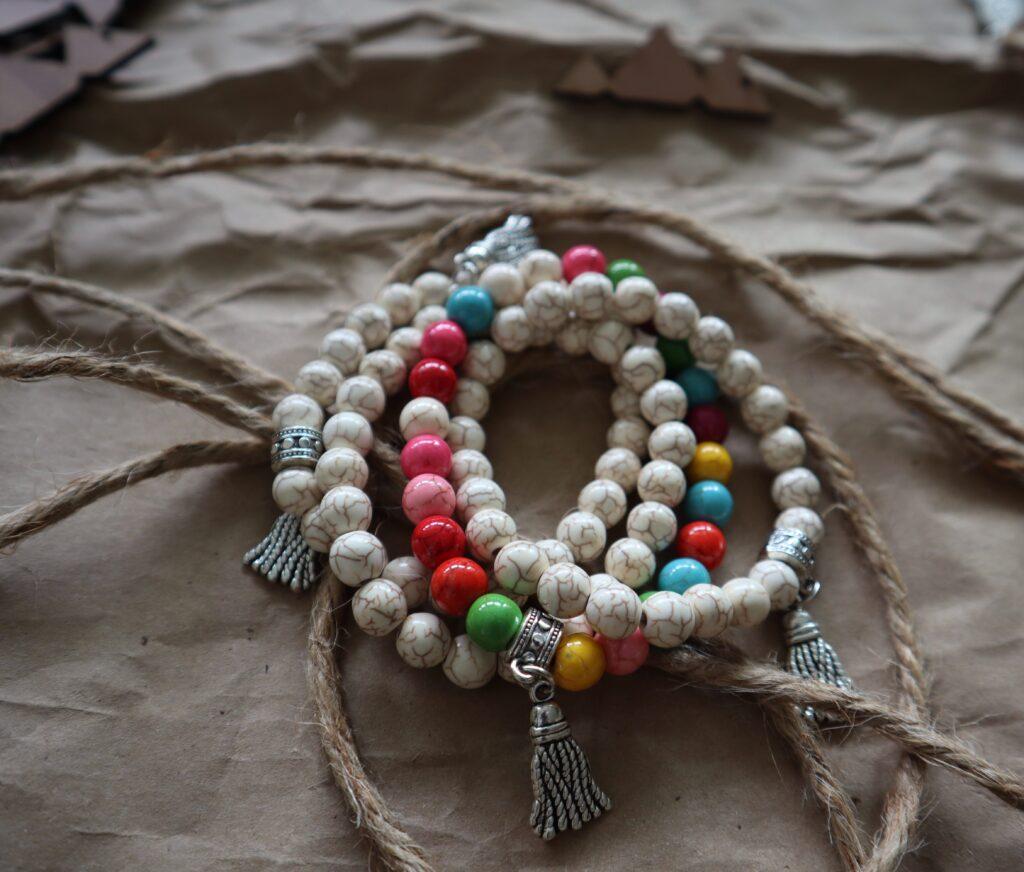
Bead Bracelets: Adding beads to your DIY string bracelet can give it an extra dimension and style. Bead bracelets can feature various types of beads, such as glass, crystal, or wood, as well as different patterns and combinations, creating endless design possibilities.
Rhinestones and Embellishments: To add some sparkle to your DIY string bracelet, you can incorporate rhinestones or other decorative accents. These embellishments can be added during the knotting process or glued on afterward, depending on the design and materials.
Leather Cord: For a more rustic and sturdy look, you can use leather cord instead of embroidery floss or yarn. Leather cord is a versatile material that can be used with various knotting techniques, such as braiding or simple square knots.
Remember to choose the right materials, patterns, and techniques that align with your desired style and complexity when creating your DIY string bracelet. With practice and patience, you’ll be able to craft unique and stylish bracelets to wear or share with friends.
Materials and Tools Needed for DIY String Bracelets
To make a DIY string bracelet, you will need some essential materials and tools to get started.
First and foremost, choose the type of string you want for your bracelet, such as embroidery floss or yarn. Embroidery floss is the most common choice because of its soft texture and availability in a variety of colors. You’ll also need beads if you want to add a decorative touch to your bracelet. Make sure these beads have a hole large enough to fit your chosen string.
For tools, you’ll need a good pair of scissors to cut the string accurately. To make knotting easier, you can use tape to secure one end of the string to a tabletop or a clipboard to hold the string in place while knotting.
Once you have organized your materials, it’s time to start making the knots. There are two basic knots you’ll be using, the forward knot and the backward knot. Mastering these knots is essential for creating different patterns and designs in your bracelet.
If you prefer to create a stretchy bracelet, you can use an elastic cord instead of embroidery floss or yarn. When working with elastic, it’s crucial to know how to tie a secure knot to prevent the bracelet from coming undone. A surgeon’s knot is a reliable choice for elastic bracelets, which is a square knot with an extra loop through. However, it’s important to note that you should never use crimp beads with elastic, as they can weaken the material and cause it to break.
By gathering these materials and tools, you’ll be well-prepared to create your own DIY string bracelets with confidence and ease.
Friendship Bracelets
Friendship bracelets have always been a popular craft, especially among kids and teens. These bracelets, typically created using colorful strings, serve as symbols of friendship and can be easily made with basic supplies and a little patience. This guide provides you with a brief overview and the basics to help you begin your friendship bracelet journey.
To start, you will need the proper supplies for making friendship bracelets. The primary material is string, and the best type of string for friendship bracelets is embroidery floss. Embroidery floss is a smooth, 6-stranded cotton string that comes in a wide variety of colors, including neons and metallics. Brands like DMC, Anchor, and J&P Coats are some common and reliable options to consider when purchasing embroidery floss.
Once you have gathered your friendship bracelet supplies, the next step is learning how to create different patterns. There are numerous friendship bracelet patterns available, ranging from simple designs that are perfect for beginners to more intricate ones that require advanced skills and precision. By familiarizing yourself with the basic knots involved in making these bracelets, you’ll be better equipped to follow and create various patterns yourself.
Here are a few popular patterns that can help get you started:
- Candy Stripe: A classic and simple pattern consisting of diagonal stripes.
- Chevron: A popular design with a V-shaped pattern that zigzags across the bracelet.
- Diamonds: A more intricate pattern that creates a diamond-like shape along the bracelet.
While beginning to make friendship bracelets, you might find it helpful to use a variety of resources, including video tutorials and step-by-step guides. These resources can provide detailed and visual information, making the process more accessible for novice bracelet makers.
Remember to have fun while making friendship bracelets and allow yourself some time to practice and learn. With a confident and knowledgeable approach, you’ll soon be able to create beautiful and meaningful bracelets for yourself and your friends.
DIY Bracelet Techniques
Knots and Braids
The overhand knot is the foundation for many string bracelet designs. Start with this knot before getting into more detailed patterns. Moving on to more advanced techniques, you can create complementary and analogous color schemes based on the colors you choose for your strings. For instance, braided bracelets with contrasting colors make stunning designs. The chevron pattern is another popular choice, featuring an arrow-like design, by following a simple knot sequence.
Beaded Bracelets
In addition to knots and braids, incorporating beads can add a touch of elegance to your string bracelets. Beaded designs can vary from simple to more intricate patterns. Simply thread beads onto the desired string, and combine them with knots or braids to create unique designs. Choose the size, shape, and color of the beads according to your desired aesthetics.
| Bead Type | Suitable for |
|---|---|
| Small beads | Delicate, minimalist bracelets |
| Large beads | Bold, statement pieces |
| Geometric beads | Modern, edgy bracelets |
| Organic beads | Free-spirited, boho styles |
Tassels and Twists
String bracelets can also be embellished with tassels and twists to add extra flair. Tassels can be made by folding a bundle of strings and tying them securely at the top, then trimming the bottom to achieve a neat finish. Attach tassels to the end of your bracelet or incorporate them into the design for a more dynamic look.
Twists are another way of adding texture and visual interest to your string bracelets. The twisted pattern can be achieved by simply twisting two or more strings together and securing them with a knot. A popular twist variation is the spiral or corkscrew pattern, created by repeatedly tying half knots with alternating directions. Experiment with different combinations of knots, twists, and colors to design the perfect bracelet for you.
Step-by-Step Guides for DIY String Bracelets
Simple Chevron Pattern
The Simple Chevron Pattern is perfect for beginners looking for an easy-to-follow design. First, choose your embroidery thread colors and cut 6 pieces of thread long enough to fit around your wrist, allowing at least an extra 1 inch (2.5 cm) per knot source. Use a clipboard or masking tape to secure the threads and start making the bracelet. Create a sequence of forward and backward hitch knots to construct the chevron pattern.
Two Strings Bracelet
A straightforward two strings bracelet can be made using the forward and backward hitch knots. First, choose two colors of string, and cut two long strands of each color. Lay the strings flat and aligned, and then fold the strands to create a loop at the center. Secure the loop with masking tape or a safety pin to your working surface. Follow the step-by-step instructions in this guide to create the knots that build the two strings bracelet pattern.
Candy Stripe Friendship Bracelet
For a cute candy stripe bracelet design, first gather embroidery floss in multiple colors, a clipboard or safety pin, and optional charms or spacer beads source. Cut each strand long enough to wrap around your wrist with extra length for knotting. Secure the strings to a working surface, arrange them in the desired color sequence, and start creating rows of forward hitch knots.
Add spacer beads throughout the bracelet to add a unique touch and personalize your design. The final result will be a colorful and eye-catching candy stripe friendship bracelet perfect for yourself or as a gift for a friend.
Unique DIY Bracelets
Paracord Bracelets
Paracord bracelets are both fashionable and functional. Made from strong paracord material, they can be unraveled to help you in emergency situations. These bracelets are relatively easy to make using a variety of knotting techniques. Combine different colors to create your own unique design and add a buckle to secure it on your wrist.
Sweater Bangles
Don’t let old sweaters go to waste – transform them into cozy, stylish sweater bangles! Simply cut the sweater into strips and wrap them around a blank bangle. Secure the ends with fabric glue or needle and thread. Mix and match different patterns and textures to create a stunning accessory that’s perfect for fall and winter.
DIY Fabric Bead Bracelet
Create a DIY fabric bead bracelet by cutting strips of fabric and wrapping them around wooden or plastic beads. Use colorful fabrics with attractive patterns to make your bracelet stand out. Secure the fabric with a dab of fabric glue, and string the beads onto elastic cord for easy wearability.
DIY Etched Copper Cuff
Elevate your bracelet game with a DIY etched copper cuff. Start with a sheet of copper and use a resist pen to draw your desired design. Then, apply a chemical etchant to reveal the design on the copper sheet. Cut the sheet into a band, shape it around your wrist and polish it to bring out the copper’s natural shine.
Evil Eye Bracelet
Protect yourself from negativity with an evil eye bracelet. Start with a simple chain bracelet and add small glass evil eye beads and charms. Use lobster clasps to attach the charms, allowing you to easily switch them out. Combine different colors and shapes for an eye-catching accessory.
Trendy Bee Cuff
Create a trendy bee cuff by attaching a bee charm to a simple cuff bracelet. This whimsical accessory is both fun and fashionable. Choose gold or silver-tone for a more neutral look, or get creative by painting the charm in your favorite colors.
Hex Nut Diamond Bracelet
Give a nod to industrial style with a hex nut diamond bracelet. String hex nuts on wire or cord, creating diamond shapes by connecting the corners with smaller jump rings. Attach a clasp to complete the bracelet. This unique accessory pairs well with both casual and dressed-up outfits.
Incorporate these ideas into your bracelet-making adventures and explore a variety of materials like painted wood bangle bracelets, sea glass bracelets, pom-pom bracelets, and stamped initial bracelets. With a little creativity, you can craft your own unique and stunning accessories.
Jewelry Making Tips
Selecting Quality Materials
When creating DIY string bracelets, it’s essential to use high-quality materials for a long-lasting piece of jewelry. Select embroidery thread or beading cord that is durable and resistant to fraying. Choose a variety of colors for a vibrant design, or stick to a few tones for a more minimalistic look. Remember to cut the thread longer than needed to allow room for knotting and adjustments. Opt for beads made of glass, semi-precious stones, or high-quality plastic to ensure a visually appealing and durable bracelet.
Working in a Comfortable Space
Whether you’re working in an apartment or a house, it’s vital to have a comfortable and well-lit workspace for jewelry making. Designate a room or area with ample lighting and a sturdy, flat surface like a table or a desk. This will help you clearly see your materials, reduce eye strain, and minimize mistakes while working on your project. Additionally, investing in a cushioned chair or ergonomic seating will provide support during long crafting sessions.
Organizing Beads and Supplies
Keeping your beads and supplies organized is crucial for efficiency and reducing frustration during the jewelry making process. Consider using:
- Divided trays: Segment your beads by color, size, or material to easily find the perfect piece for your project.
- Stackable containers: Save space and maintain order by stacking clear plastic containers with removable lids.
- Labeling system: Label your bead storage containers or trays with clear identifiers for quick access.
- Tool caddy: Keep your pliers, scissors, and other crafting tools in a dedicated space so you can easily find and use them when needed.
By following these tips, you’ll improve your jewelry making skills and create stunning DIY string bracelets with ease.
Frequently Asked Questions
How can beginners create friendship bracelets?
Beginners can start with simple patterns that only involve a few colors and basic knots. First, choose the embroidery floss colors and cut them to a suitable length. Then, tie the strands together, secure the knot, and start practicing the 4 basic knots to create various patterns. As you gain confidence, you can experiment with more advanced designs.
What are some popular friendship bracelet patterns?
Popular patterns include candy stripe, chevron, fishtail, and diamond. These patterns can be created using different knot types and color variations, resulting in unique and personalized bracelets. The more you practice, the faster you’ll be able to create these friendship bracelet patterns.
What materials are needed to make easy string bracelets?
The primary material needed is embroidery floss, which is a smooth, 6-stranded cotton string available in various colors, including neons and metallics. You’ll also need scissors to cut the string and a clipboard or tape to help secure the bracelet while tying the knots. Some people also prefer using a needle to thread beads onto the floss.
What’s the process for creating a 4-string friendship bracelet?
Start by selecting 4 colors of embroidery floss and cutting them to the desired length. Tie the strands together in a knot, secure the knot, and arrange the strings in the order you want the colors to appear. Then, use the different knot types like forward and backward knots to create a pattern. For example, a candy stripe pattern can be achieved with just 4 strings.
How can you add beads to a friendship bracelet?
To add beads, first select beads with a hole large enough for the embroidery floss to pass through. Thread the bead onto the floss when you reach the desired position in the pattern. You can use a needle to help guide the floss through the bead, if necessary. Then, continue tying knots and adding beads as you wish, following your desired bracelet pattern.
How do you make a heart-design string bracelet?
To create a heart-design string bracelet, you’ll need two colors of floss. Start by cutting four strands of each color, tying the strings together, and securing the knot. Arrange the strings in a specific order, then follow a step-by-step guide on creating the heart pattern using forward and backward knots. The more you practice, the better your heart designs will look.
The step-by-step guides for friendship bracelet knots are incredibly clear, making it easy to experiment with color combinations in a way that feels almost as rewarding as guessing today’s close word answer on Closeword.
The step-by-step knotting guides and color combos make this a solid starting point for beginners, and pairing your finished bracelets with a cute Unicode font can add a fun digital touch to online gift tags or captions.
The explanation of basic knots and chevron patterns is excellent for mastering friendship bracelets, and I found similar techniques discussed on Some Random Facts.