Creating your own DIY bracelets is not only a fun and engaging activity, but it also allows you to express your personal style and unique creativity. Throughout this article, we will delve into the world of DIY bracelet: easy steps to make your own – which is exploring various methods and materials suited to beginners and skilled artisans alike.
With a plethora of crafting techniques and materials available, anybody can become a budding designer and produce an array of beautiful and customized bracelets for themselves or share them with friends and family as cherished gifts.
From simple braiding with ribbons to working with metal, clay, and beads, there are endless opportunities to fashion one-of-a-kind accessories that showcase your individuality and artistic flair.
Whether you’re new to jewelry making or looking to expand your crafting repertoire, we’re confident that the techniques and insights shared in this article will inspire you to create delightful and eye-catching bracelets that are both fashionable and uniquely your own. So, gather your supplies, and let’s embark on this creative journey together!
Choosing Materials
When creating a DIY bracelet, selecting the right materials is essential to achieve the desired outcome. In this section, we will cover various types of materials and their suitable use in bracelet making.
Leather and Leather Cord
Leather and leather cords are versatile materials suitable for a variety of bracelet designs. They are available in different colors, widths, and finishes. This material is ideal for creating stylish, durable bracelets with a rustic or casual vibe. For example:
- Leather cords: Perfect for braiding or knotting techniques
- Flat leather strips: Ideal for layered or wrap bracelets
Beads
Beads play a crucial role in adding color, texture, and detail to a bracelet design. There are various types of beads available in the market, including:
- Glass beads: These offer a shiny, polished look and come in various shapes, sizes, and colors
- Pearl beads: They provide a sophisticated, timeless appearance suitable for elegant jewelry
- Plastic beads: An affordable option with a wide range of colors and shapes
- Wooden beads: Great for adding a natural, earthy touch to a bracelet
Ribbon and Thread
Ribbon and thread materials allow for intricate designs, and their softness and flexibility make them comfortable to wear. Consider the following options:
- Silk or satin ribbons: These materials provide a luxurious, delicate touch to a bracelet
- Cotton or polyester threads: Suitable for intricate weaving patterns or macrame techniques
Clasps and Closures
Choosing the appropriate clasp or closure ensures your DIY bracelet is secure and comfortable to wear. Some popular options include:
- Toggle clasp: A functional and stylish clasp made of a bar and ring mechanism
- Lobster clasp: A secure, easy-to-use closure commonly used in bracelet designs
Glue and Adhesives
Glue and adhesives play an essential role in connecting and securing various bracelet components. Selecting the right adhesive depends on the materials used in the bracelet and the desired strength of the bond. Always opt for jewelry-specific glues, as they are formulated specifically for use with materials commonly found in DIY bracelets.
Types of DIY Bracelets
In this section, we will explore various types of DIY bracelets that you can create at home using different materials and techniques. From beaded to braided styles, there’s a bracelet design for everyone.
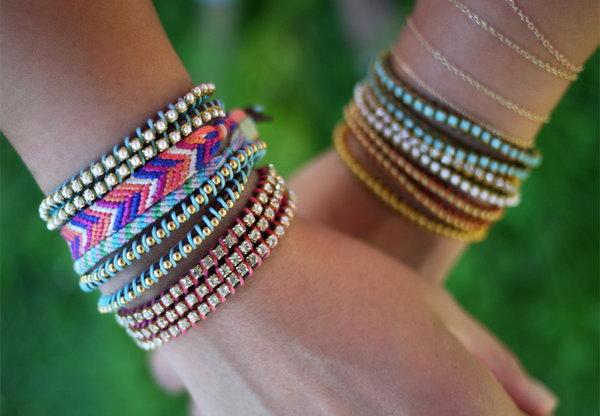
Beaded Bracelets
Beaded bracelets are a popular choice due to their versatility and simplicity. You can create a beautiful bead bracelet using various beads made of glass, wood, or even gemstones. Choose your favorite colors and string them onto elastic cord, nylon thread, or wire, depending on your desired look and feel.
Wrap Bracelets
Wrap bracelets are stylish and can be made with a variety of materials, such as leather, yarn, or fabric. They typically wrap multiple times around the wrist and may feature beads or charms for added appeal. You can even create a unique evil eye bracelet with a focal bead to ward off negativity.
Braided Bracelets
Braided bracelets are a classic choice, often made from embroidery floss, yarn, or fabric strips. You can create different patterns by varying the number of strands or colors used. One popular option is the braided T-shirt yarn bracelet, which repurposes an old shirt into a stylish accessory.
Macrame Bracelets
Macrame bracelets use knotting techniques to create intricate designs, making them a great option for those seeking a more complex project. You can use materials like hemp, waxed cotton, or nylon cord to weave your macrame bracelet, with endless patterns and color combinations to choose from.
Paracord Bracelets
Paracord bracelets are not only fashionable but practical, as they can be unraveled in emergencies to provide a durable cord. Made from woven nylon parachute cord, paracord bracelets come in a range of patterns, thicknesses, and colors.
Bangle Bracelets
Bangle bracelets are rigid bracelets typically made from metal, wood, or plastic. You can create your own wood bangle bracelets and personalize them with paint, stain, or decorative elements. More unique takes on bangle bracelets include attaching rhinestones or studs to create studded bangles.
Zipper Bracelets
A creative and unique option, zipper bracelets use repurposed zippers to create a wearable piece of art. Zipper bracelets can be made from one or multiple zippers and embellished with additional materials like beads, fabric, or buttons.
Rhinestone Bracelets
Rhinestone bracelets add a touch of sparkle to your wrist and can be made in various styles, from simple to elaborate. One idea is to create a rhinestone vinyl bead bracelet, combining the texture of vinyl with the shine of rhinestones. Another option is to attach rhinestones to a wrap bracelet, creating a mix of glamour and casual style.
Have fun exploring these DIY bracelet types and expressing your creativity. With so many materials and techniques to choose from, there’s a design that will suit your personal taste and skill level.
Popular DIY Bracelet Designs
Friendship Bracelets
Friendship bracelets are a timeless and sentimental accessory, often made using embroidery thread in various colors. There are several knotting patterns you can use to create unique designs, like the chevron, fishtail, and heart pattern. These bracelets are also easily customizable, making them ideal gifts among friends.
Charm Bracelets
Charm bracelets allow you to showcase your personality by attaching various charms to a base chain. You can create your own DIY charm bracelet by selecting a chain and adding unique charms that represent your interests, memories, or milestones. Popular charm materials include metal, glass, and even semi-precious stones.
Rope Bracelets
Rope bracelets, such as paracord bracelets, can be both stylish and functional. They come in numerous colors and patterns, and can even serve as an emergency rope if needed. There are various weaving techniques to choose from, like the cobra, fishtail, and wide Solomon. These bracelets can also be easily adjusted to fit most wrist sizes.
Leather Cuffs
Leather cuffs are a versatile accessory that can give any outfit an edgy look. Creating a DIY leather cuff typically involves cutting a leather strip, adding holes for fasteners, and embellishing the cuff with studs or other accessories. They can be made in various widths and lengths, and you can choose between different types of leather depending on your personal style.
Fabric and Leather Studded Bracelets
Combining fabric and leather materials results in unique DIY studded bracelet designs. These bracelets often involve braiding fabric strips with a leather component, and then adding metal studs for a touch of glamor. The final result is a fashionable accessory that is comfortable to wear and can be personalized with different fabric patterns, leather colors, and stud designs.
Customizing Your Bracelets
When it comes to DIY bracelets, one of the joys is being able to customize and truly make the piece your own. There are endless options to explore when personalizing your bracelet, whether you’re adding charms, beads, or spacers. In this section, we will look at some ideas to inspire you on your bracelet customization journey.
Adding Pendants and Charms
Adding pendants and charms to your bracelet can create a powerful visual impact and make your design truly unique. You can opt for a theme or mix and match different elements to tell a story. Some popular pendant and charm ideas include:
- Letters for initials or meaningful words
- Shapes like hearts, stars, or geometric figures
- Symbols of personal significance, such as zodiac signs or cultural icons
- Objects representing hobbies or interests, like musical instruments or sports equipment
Adding these elements lends a personal touch to your bracelet, whether you’re making it for yourself or as a special gift for someone else.
Personalizing with Beads and Spacers
Beads and spacers are another way to customize your bracelet, allowing you to express your style and preferences. They come in various materials, colors, and sizes that can lend texture and depth to your design. Some options to consider:
- Glass beads for a touch of elegance
- Semi-precious stone beads, each with their own symbolism and healing properties
- Metal beads and spacers that add a hint of luxury
- Wooden beads for a more rustic, earthy feel
Combining different types of beads and spacers can create a unique pattern and make your bracelet comfortable to wear.
Creating a Unique Style
The final and perhaps most important step in customizing your bracelet is developing your own unique style. This goes beyond adding pendants or personalizing with beads. It’s about infusing your personality and story into the piece. Some ideas for creating a distinctive look:
- Experiment with different materials, from leather to fabric to metal
- Use contrasting colors or stick to a harmonious color palette
- Integrate various textures for added visual interest
- Combine different techniques, such as macramé, wire wrapping, and bead stringing
By taking the time to explore various customization options, you’ll create a DIY bracelet that is a true expression of who you are and what makes you unique.
DIY Bracelet Tutorials
In this section, we will dive into various DIY Bracelet Tutorials to help you create unique and personalized bracelets. We have compiled step-by-step guides, video tutorials, and inspirational resources to get you started on your bracelet-making journey.
Step-By-Step Guides
Following a step-by-step guide is an excellent way to begin your bracelet making adventure. These guides often include detailed instructions and helpful images. For example, this beaded elastic bracelet tutorial provides clear directions on how to tie elastic bracelets using beads and other materials. This approach ensures that you can create stunning bracelets while learning the basics of jewelry making.
Video Tutorials
Video tutorials offer a visual approach to learning bracelet making techniques. These tutorials allow you to see the process in real-time, enabling you to follow along and replicate the techniques easily. For instance, this video on DIY friendship bracelets demonstrates five easy bracelet designs perfect for beginners. By watching these videos, you can learn the essentials and improve your skills in no time.
Inspirational Resources
Lastly, inspirational resources can provide you with creative ideas and designs for your bracelets. These resources may include blogs, social media accounts, or galleries showcasing various bracelet styles and themes. A great example of this is the 100+ Easy DIY Bracelets collection which offers a wide range of cute bracelet ideas, allowing you to explore different styles and materials. Browsing through these resources can help spark your creativity and inspire your unique bracelet creations.
Remember, practice makes perfect, and there’s always room for growth in the world of bracelet making. Utilize these tutorials and resources to expand your skillset and have fun while doing it. Happy crafting!
Jewelry Making Techniques
Braiding Methods
Braiding is a popular technique in DIY bracelet making, often using materials like embroidery floss or braided thread. One well-known style is the friendship bracelet, where various colors of embroidery floss are braided or woven together into intricate patterns. Another unique design is the hex nut diamond bracelet, which incorporates hex nuts into the braiding process for a more industrial look.
Wire Wrapping
Wire wrapping is a versatile technique that can be used to create a variety of bracelets, such as a wire bracelet with beads or charms. To make a wire-wrapped bracelet, you’ll need:
- Jewelry wire
- Beads or charms of your choice
- Pliers (round-nose and flat-nose)
Start by securing one end of the wire and stringing your beads or charms in a desired pattern. Then, use the round-nose pliers to create loops, wrapping the wire around the loop to secure the beads in place. Finally, finish off your bracelet by attaching a clasp with the flat-nose pliers.
Macrame Knots
Macrame is another popular DIY bracelet technique, often using Chinese knotting cord to create intricate, knot-based patterns. Some common macrame knots include:
- Square Knot: The basic knot for macrame, creating a flat, square shape.
- Spiral Stitch: A series of half-knots that creates a spiral pattern.
- Double Half Hitch: A more complex knot that can be used for angled patterns.
By combining different macrame knots, you can create unique and intricate bracelet designs.
Ladder Stitch
The ladder stitch is a beading technique that can be used to create a ladder stitch bracelet. This technique involves:
- Beads (such as seed beads or larger beads)
- Beading thread and needle
- A clasp
Begin by stringing a row of beads and passing the needle back through the beads to form a loop. Then, add another row of beads and secure them by passing the needle through the previous row’s beads and the new row’s beads. Continue this process to create a ladder pattern, finishing the bracelet by attaching a clasp.
Tips for DIY Bracelet Success
Selecting High-Quality Materials
When creating a DIY bracelet, it’s crucial to start with high-quality materials. Choose durable threads, beads, and clasps, as this will directly impact the lifespan and appearance of your bracelet. Consider using embroidery thread for a colorful and sturdy option. Furthermore, opt for beads made from glass, metal, or semi-precious stones instead of plastic ones to enhance the bracelet’s durability and sophistication.
Maintaining Balance and Symmetry
A well-constructed bracelet requires a sense of balance and symmetry. Ensure that your design is visually appealing and proportionate: beads, knots, and threads should be evenly distributed throughout the bracelet. To achieve this, plan your bracelet layout beforehand, and measure the materials accurately. A woven spiral bracelet can serve as an excellent example for maintaining symmetry in your design.
- Measure twice, cut once: Be diligent with your measurements to avoid wasting materials.
- Practice makes perfect: Test your design with inexpensive materials before committing to high-quality components.
Adding a Personal Touch
A unique aspect of DIY bracelets is the opportunity to add a personal touch. Customize your bracelet with meaningful colors, initials, or charms to reflect your individuality or commemorate a special occasion. Experiment with different patterns, and consider incorporating sentimental elements like:
- Initial beads: Include your initials or those of a loved one for a personalized touch.
- Birthstones: Add birthstones corresponding to your birth month or that of a friend or family member.
- Charm accents: Select charms that represent your interests, hobbies, or favorite symbols.
DIY Bracelet: Easy Steps to Create Your Own – Summary
In summary, DIY bracelets offer a creative and personalized way to accessorize any outfit. With a wide range of materials and techniques available, anyone can create a unique and stylish piece that reflects their individuality. By following simple tutorials like these for knitting yarn from an old shirt or braiding ribbon, you can produce beautiful and sophisticated bracelets without any prior experience.
Additionally, DIY bracelets make wonderful gifts, showcasing thoughtfulness and effort put into crafting a one-of-a-kind accessory. The art of making friendship bracelets, for example, can be a bonding activity among friends, leading to precious keepsakes that symbolize a lasting connection. There are many free easy friendship bracelet patterns for beginners that can serve as a starting point for this enjoyable pastime.
Finally, the versatility of DIY bracelets goes beyond mere aesthetic appeal. By exploring a variety of DIY paracord bracelet patterns, one can create bracelets designed for practical purposes, such as survival gear and outdoor enthusiasts. These paracord bracelets not only serve as fashionable accessories but also come in handy in emergency situations.
In conclusion, crafting DIY bracelets presents an opportunity to express creativity, foster friendships, and even learn practical skills. With an abundance of resources and tutorials available, anyone can embark on this fulfilling journey of making their own unique and unforgettable accessories.
DIY Bracelet: Easy Steps to Create Your Own FAQs
How do you make homemade bracelets?
Creating homemade bracelets involves selecting the materials, learning different knotting or beading techniques, and assembling the bracelet. There are numerous methods for making bracelets, including braiding, beading, and using a combination of knots. Online tutorials and DIY bracelet projects can provide step-by-step guidance for beginners.
What materials are needed to create a bracelet?
Materials required for making a bracelet depend on the design and technique chosen. Common materials include strings, cords, beads, clasps, and charms. You might also need tools like scissors, pliers, and glue. For specific materials, check the tutorial or pattern you’re following for your chosen bracelet style.
What is the easiest bracelet design to make?
Braided leather bracelets are considered one of the easiest designs to make. They only require a leather cord, a clasp, and a basic braiding technique. You can learn more about creating an easy braided leather bracelet with step-by-step instructions.
Which type of string is ideal for creating DIY bracelets?
Embroidery floss, craft cord, or cotton thread are commonly used strings for DIY bracelets. The choice of string depends on the bracelet design and the desired outcome. For example, embroidery floss is suitable for friendship bracelets, while craft cords or paracords work well for making survival bracelets.
How do you make a friendship bracelet with 4 strings?
A friendship bracelet with 4 strings can be made using simple knotting techniques. For example, you can use four basic friendship bracelet knots: forward knot, backward knot, forward-backward knot, and backward-forward knot. Use these knots to create different patterns and color combinations.
What are some simple techniques for making beaded bracelets?
Beaded bracelets can be made using various techniques, from simple stringing to more intricate bead weaving. Start by selecting beads and a string, then decide on a pattern. For beginners, it is advisable to start with a basic stringing technique or an easy clay bead bracelet. As you become more comfortable, you can explore advanced techniques like bead stitching or weaving.
The clear guidance on choosing leather cords and braiding techniques makes this perfect for beginners—as immersive as exploring new creatures.